
Your Webflow site attracts visitors. Email marketing turns those visitors into customers, subscribers, and repeat buyers.
Most people who land on your site aren’t ready to purchase immediately. They’re researching, comparing options, or just starting to understand their problem. Email gives you the opportunity to stay connected with these visitors after they leave, nurture the relationship, and be there when they’re ready to take action.
Once your email platform is added, it works automatically—welcoming new subscribers, sending targeted content, and converting browsers into buyers while you focus on other parts of your business.
Why Webflow Sites Need Email Marketing Integration
When someone visits your Webflow site and leaves, you’ve lost your chance to communicate unless they come back. Email captures that opportunity by giving you a direct line to people who’ve shown interest in what you offer.
Unlike social media where algorithms control visibility, or paid ads that stop when your budget runs out, email puts you in control. Webflow email integration requires a third-party platform because Webflow focuses exclusively on website building.
How to Set Up Email Marketing on Webflow with AWeber
The integration takes less than an hour with AWeber.
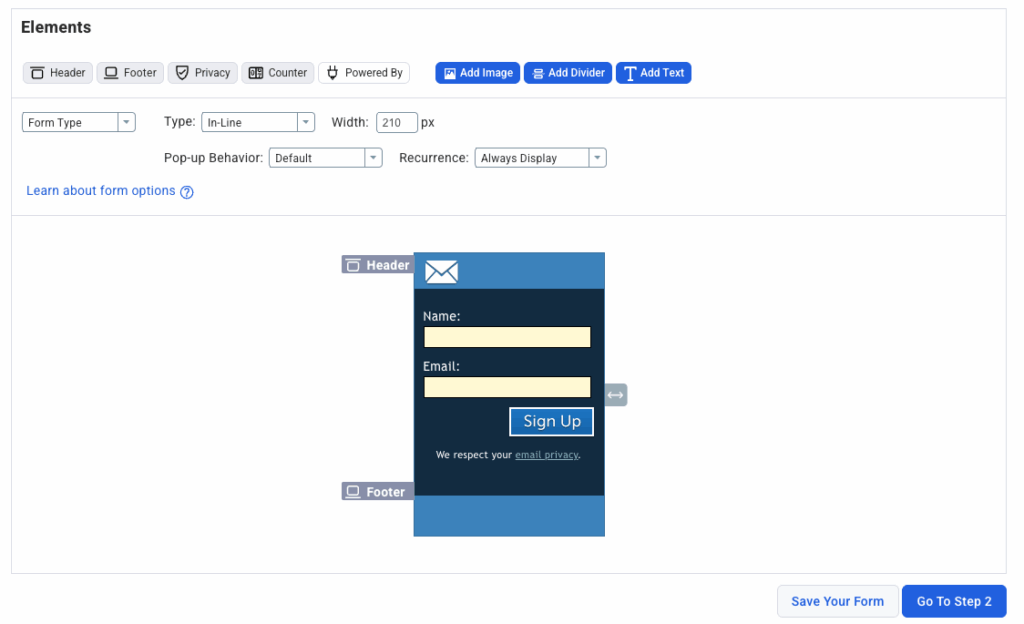
Step 1: Create Your Signup Form in AWeber
Sign up for AWeber and navigate to the signup forms section. Choose a form template or create one from scratch using the drag-and-drop builder. Customize the fields you want to collect—typically name and email address work best. Learn more about growing your email list with strategic form placement.
Step 2: Get Your Embed Code
Once your form is ready, click “Publish” and select “Embed on Website.” AWeber generates a code snippet for your form. Copy this embed code—you’ll paste it into your Webflow pages.
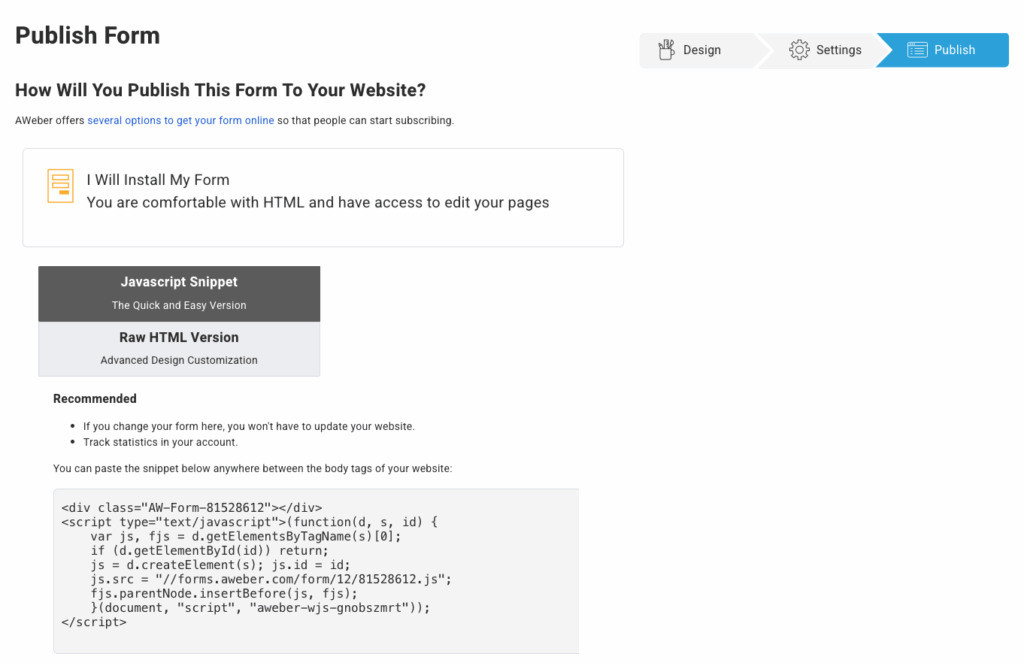
Step 3: Add the Form to Your Webflow Pages
In your Webflow Designer, drag an “Embed” element onto the page where you want your signup form to appear. Paste the AWeber embed code into the custom code field. Publish your Webflow site to make the form live.
Add forms to multiple pages for maximum visibility—blog posts, homepage, about page, and service pages all work well.
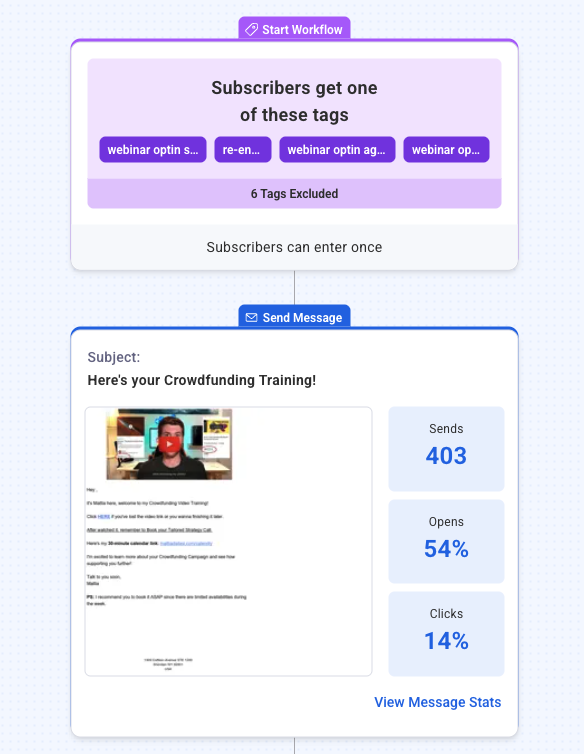
Step 4: Build Your Welcome Automation
Navigate to AWeber’s automation section and create a new workflow. Set your trigger to “Subscriber joins list.”
Create a 3-email welcome series:
Email 1 (Immediate): Welcome subscribers and set expectations
Email 2 (Day 2-3): Share your most valuable resource
Email 3 (Day 5-7): Invite them to take the next step
Use AWeber’s drag-and-drop email builder to design messages. Our AI Writing Assistant generates subject lines and copy instantly.
Step 5: Test Everything
Before going live, test the complete process. Submit your Webflow form using a test email address. Verify the subscriber appears in your AWeber list, check that your welcome automation triggers correctly, and confirm all three emails send at the right intervals.
Make any necessary adjustments before promoting your form to real visitors.
Best Practices for Webflow Email Marketing
Position Forms Strategically
Most visitors arrive at specific blog posts or service pages from Google, not your homepage. Place email signup forms on every page. Test end-of-post forms, exit-intent pop-ups, inline forms, and sidebar forms.
Tag Subscribers Based on Their Actions
Tags are labels you attach to subscribers based on their behavior, letting you send targeted content to specific groups.
You can tag subscribers based on:
- Form submissions: Tag by which form they filled out (blog signup vs. consultation request)
- Lead magnet downloads: Tag by which resource they requested
- Link clicks: Tag subscribers who click specific links in your emails
- Page visits: Tag based on which Webflow pages they visited before subscribing
- Purchase behavior: Tag customers separately from prospects
AWeber’s tagging system applies these segments automatically when you configure your forms and automations.
Test Key Variables
Small improvements compound over time. A/B testing can improve email performance by 49% or more. Test one variable at a time to identify what drives results.
What you can test:
Subject lines: Curiosity-driven vs. benefit-driven. Personalized vs. generic. Short (under 40 characters) vs. longer headlines.
Send times: Morning (8-10am) vs. afternoon (1-3pm) vs. evening (6-8pm). Different days of the week for your specific audience.
Call-to-action placement: Above the fold vs. end of email. Button vs. text link. “Get Started” vs. “Download Now” vs. “Learn More.”
Email length: Short (100-200 words) for announcements. Longer (500+ words) for educational content.
Sending frequency: Start weekly, increase to twice weekly if engagement stays strong, decrease if open rates drop.
Frequently Asked Questions About Webflow Email Integration
Can I connect multiple Webflow forms to different email lists in AWeber?
Yes. Connect each form to a specific list, or send all forms to one master list with different tags. Single lists with tags offer more flexibility for segmentation.
Can I customize the confirmation message after someone submits a Webflow form?
Yes, but this is controlled in Webflow’s form settings, not AWeber. Customize Webflow’s success message while AWeber handles email confirmation and welcome automation.
Start Converting Webflow Traffic into Email Subscribers
It’s time to start capturing more leads from your Webflow site? Sign up for AWeber and create your first professional email signup form today. Our drag-and-drop builder, mobile-responsive templates, and 24/7 support make it simple to start growing your email list—no technical experience required.
The post How to Add Email Marketing to Your Webflow Site appeared first on AWeber.
Source link


